Earthship 2011


This was Sep. 2011 and Honey Dew is working on the earthship. This is about as far as we went on it and then started to work on the cabin. We will return to this awesome project in the near future!
We started the geodesic dome in October 2011. The geo-dome is going to be our greenhouse someday as soon as we find time to get the bond beam set and get it covered with pollycarbonate. I am very proud of myself for packing almost all the tires... Honey Dew helped to level the first row and he also helped when I was soooo close to finishing a row but was just too exhausted.
We had our bobcat guy dig us down a bit, and Glenn's truck is full of tires ready to be packed!

Glenn is checking out how sturdy the geodesic dome is once we got done putting it together.


This is about a year later, November 2012, after the tires were all packed and ready for the dome to go on top.
March 2012 is when our small cabin in the woods began to take form. Dan and Dan started the build on our happy little home.


May 2012: Glenn is building the scaffolding to help finish the upstairs.

The view out the bedroom window, looking out the front of the cabin.

The view out the bedroom window looking out the back.

Glenn is adding some extra support to the roof trusses, just for good measure.

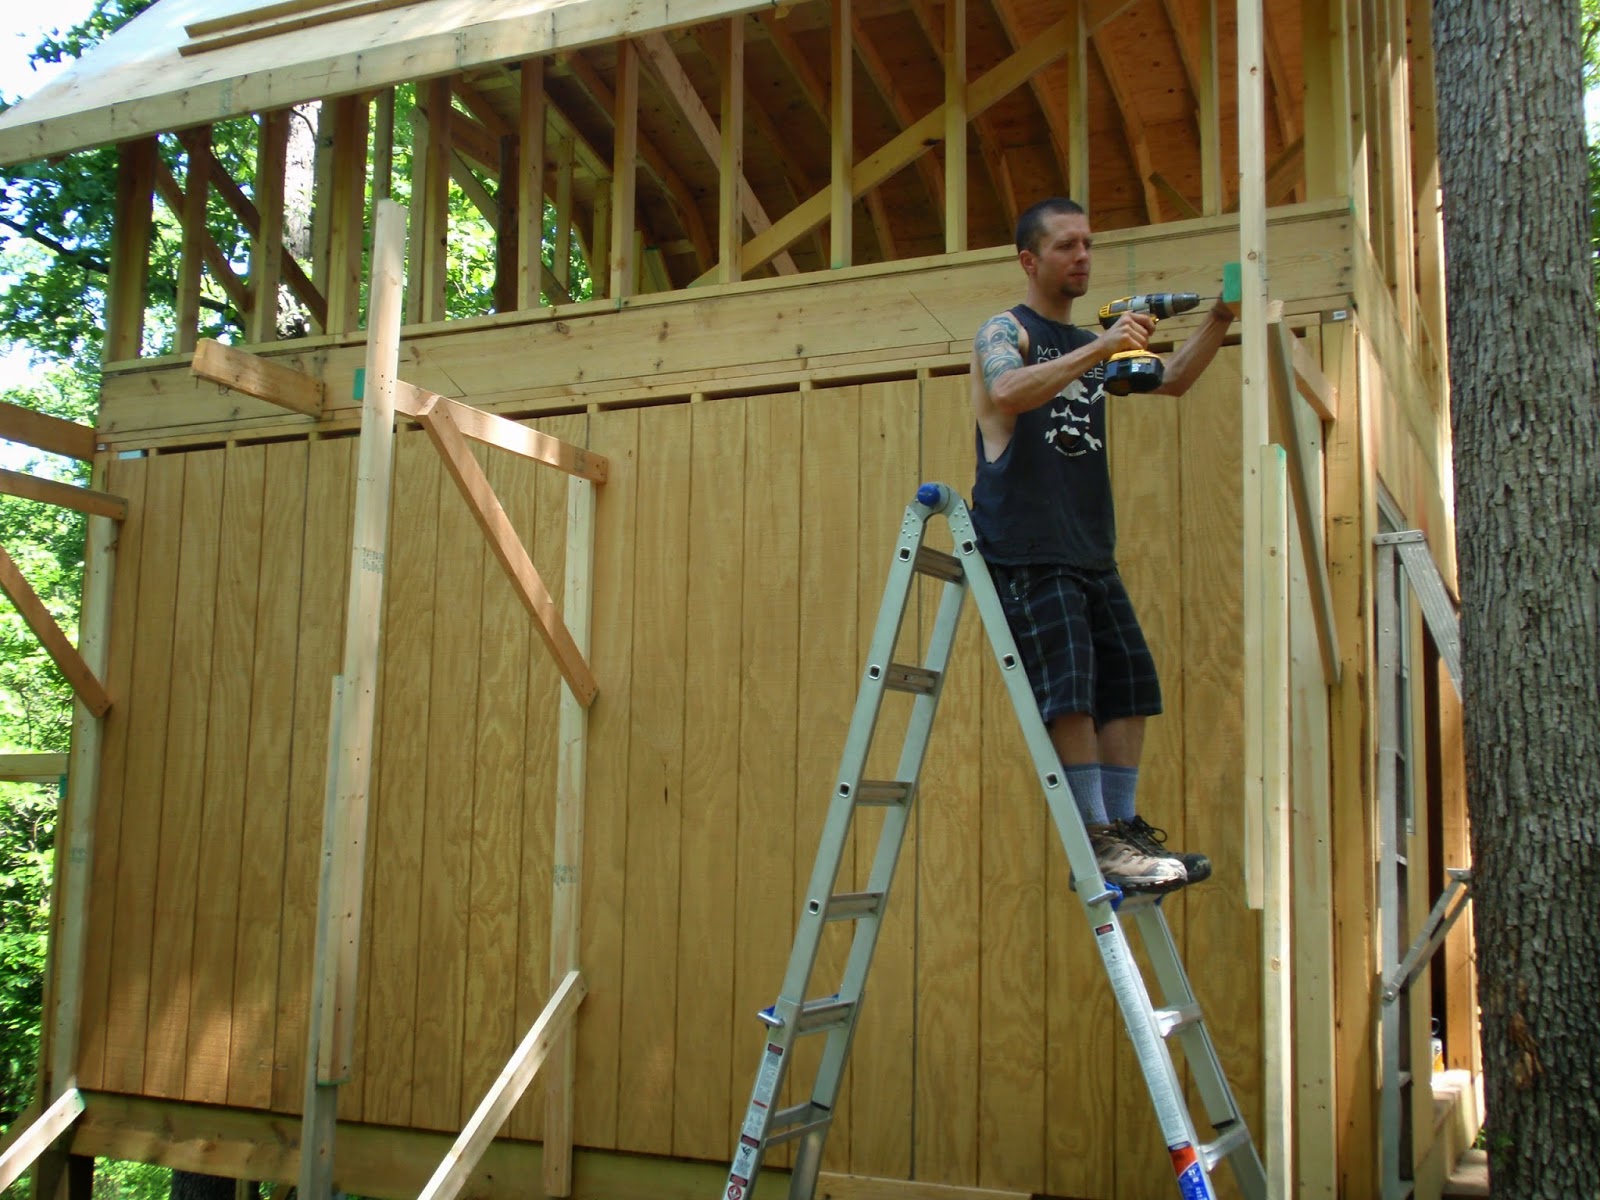
August 2012: Dan E. and Glenn FINISHING the outside walls of the cabin!


Yeahhh!! The structure of the cabin is finished!
The scaffolding is still on both sides to help put on the roof. See Mojo in the bedroom window :)

At this time we still had a ways to go before the inside would be done, so, we decided we would need to have a good ol' outhouse. Actually it's better than an outhouse. We call it the look-out, and we use the dry composting toilet method rather than the old time stinking outhouse method.
August 2012: Mojo smiling for the camera again.

The reason we call it the look out is because of this amazing window that lets you look out over the cliff while your doing your business.

We put a drain in, because we were thinking about adding a shower to it as well, but it turns out there is no need for that now.

October 2012: The lookout is finished... pretty much, we still could do some work to the inside, but it's good for now. Dave made the awesome stain glass window, we love it!


Hi this is Glenn, Johanna wants me to put my input in here because she really doesn't know too much about the pump. So, what we have here is a solar powered river pump. Its powered by one 24 volt solar panel and powers a dankoff solar slow pump. It's a dc powered pump that pumps about a gallon a minute up to 400 ft. elevation. But the suction tube can be no higher than 20ft. above the water level that it is sucking from. The water has to be filtered to 10 micron prior to going into the pump, because the graphite pump head is a percision instrument. The pump took a lot of trial and error to get it to work correctly because all the air bubbles in the line are hard to get out, but we finally got it working well. Then the river flooded to 22 ft. above normal level and submersed the whole pump, so the box was full of mud and muck. So, I had to take it all apart, clean everything and take it back down and put it together.
So, plan B had to come into effect, which was actually my first idea of how to mount the pump, but I didn't do it because I didn't think the river would get up that high. So what I did was build a mini pontoon boat about 8 ft. long out of two 8 in. PVC pipes and then capped the ends and welded the framework together to hold the tubes in position and then bolted the box to the frame. Then using nylon coated cables attached to the framework high up in the trees facing up river so when the river came up, the pontoon would float with the river and then come back down and land on the ground when the river subsided. That worked really well. That was in effect for about 6 months or so, and then some rotten curse word stole the whole thing. They must have stolen it with a boat on the river. That is what prompted me to have a well drilled.
P.S. The guys that stole it probably saved our lives, from drinking some amoeba out of the river.
September 2012: Glenn working on his solar river pump.


Plan B: Pontoon


This is the Water Organization Module (wom), that Glenn built to filter the water that we get from the river and our rain collection system. This has gone through a lot of changes since this picture was taken. I will do an update on it some day.


November 2012: Tom is painting the cabin


December 2012 the build continued...
Dan E. and Glenn dug and poured concrete for the foundation peers on a very cold day,
it started to snow and the wind could cut like a knife.
What would we do without our amazing friends?
Dan E. and Glenn dug and poured concrete for the foundation peers on a very cold day,
it started to snow and the wind could cut like a knife.
What would we do without our amazing friends?

January 2013: Glenn is working so hard and doing great!


Still January and he is already working on the roof! He put in a skylight to add some natural light to the space, it has been great!

Safety first!

February 2013: Glen made the doors and put on the roof!


May 2013: Water cistern 2,500 gallon Norwesco
We had the bobcat guy level out a hole, then he added sand and leveled it the best we could.


We packed sand into the pillars of the cistern that go through(from top to bottom) it to help support the structure. This cistern was designed to be buried.


Glenn and Mojo supervising the cistern being buried.


Now the cistern is covered. This is where a word of advice would have done us some good. Notice we don't have gutters on our new construction yet. And on this side of the cabin with the extension added, there is an awful lot of water that will rush off this puppy in the event of a rain storm. Well, if that would happen (and it did), and you just got done burying your cistern (and we did), your cistern will most likely heave, allowing the cistern to bow a bit, regardless of how much time you put into leveling the sand under it and packing the sand into all the pillars. So, just an fyi, if you plan to do something like this to help you store your water, be sure to have the gutters on before you bury the cistern.

May 2013: We have water!!!! After a lot of trial and error we got water to pump from the river, up the cliff to the very top of the hill, this was an extremely exciting day for us! All thanks to the sun that powered our water pump!

We ran a black flexible plastic water line from this point
all the way down the cliff to the solar river pump.

*Unfortunately this is no longer in working order, because our river pump was stolen, and instead of spending more time and $$$ to buy everything and Glenn having to fabricate so much for it to even function, we decided to have a well drilled instead. But this did work and we believe it would still be working if it were not taken.
June 2013: Another happy day for us! The day we first started to fill the cistern!

A good look inside the cistern, notice the pillars that are the reason it is able to be buried.
Those are packed full of sand. to help keep them sturdy.

The first few lucky droplets of water going into the cistern...

July 2013: Harry and Glenn putting up the soffit,
this is the back of the cabin and it is very high off the ground!

July 2013: We have water IN the cabin!!

This shows the blue pex tube coming out of the cistern that runs under the cabin (we have not buried it yet) and up into the extension where it goes through the W.O.M. to be filtered and then into the cabin. You can also see the large white 4in. PVC pipe that is attached to our gutter and brings in the rainwater to the cistern. This was the first setup, using the "First Flush" method that catches most of the first and dirtiest part of the rainwater that washes off the roof in the PVC on the left, that has a plastic ball that floats to the top and plugs up the pipe and then allows cleaner water to go into the cistern.

This method still needed some extra filtering because we are in the middle of the woods and have a lot of tree debris and bird poo.
So, Glenn added a sump pump basin that the water falls into after the first flush, that has a cut out with regular window screen over it to filter, then goes into the basin that has an additional coy pond filter in it as well.


In the photo on the left you can see the white PVC pipe coming out of the the cistern going away from where Glenn is sitting. This is our overflow tube that water drains out of when too much water is pumped in. It has a fine mesh screen on it to prevent mosquitoes and other critters from getting in.
The W.O.M. is to the left and Glenn is installing the
ventilation for the on demand propane water heater.

Our shower!

This is our insulation, its closed cell sprayed in insulation,
which means it is hard kind just like "great stuff" out of the can.

This is our wood burning cook stove, an awful picture with all the stuff on the stove top surface,
but you can see the oven on the right and the firebox on the the left,
both have glass windows on the front of them.

Glenn laid the tile on this side of the cabin first so we could get the stove into place.
September 2013: Glen laid the tile in most of the downstairs, excluding the bathroom. This picture is taken standing in the front door and the door in the picture is the bathroom door, with the bathroom not yet closed in, just framed and the pluming for the shower run.

Glenn decided that the original tile that we laid where the wood stove is would be way too dark for the entire bottom floor, so he put in this nice strip of tile border and finished it up with a liter tile.

Good call Glenn! This turned out really nice, not only is the color better ,
the smaller size tile is a must for this small space.

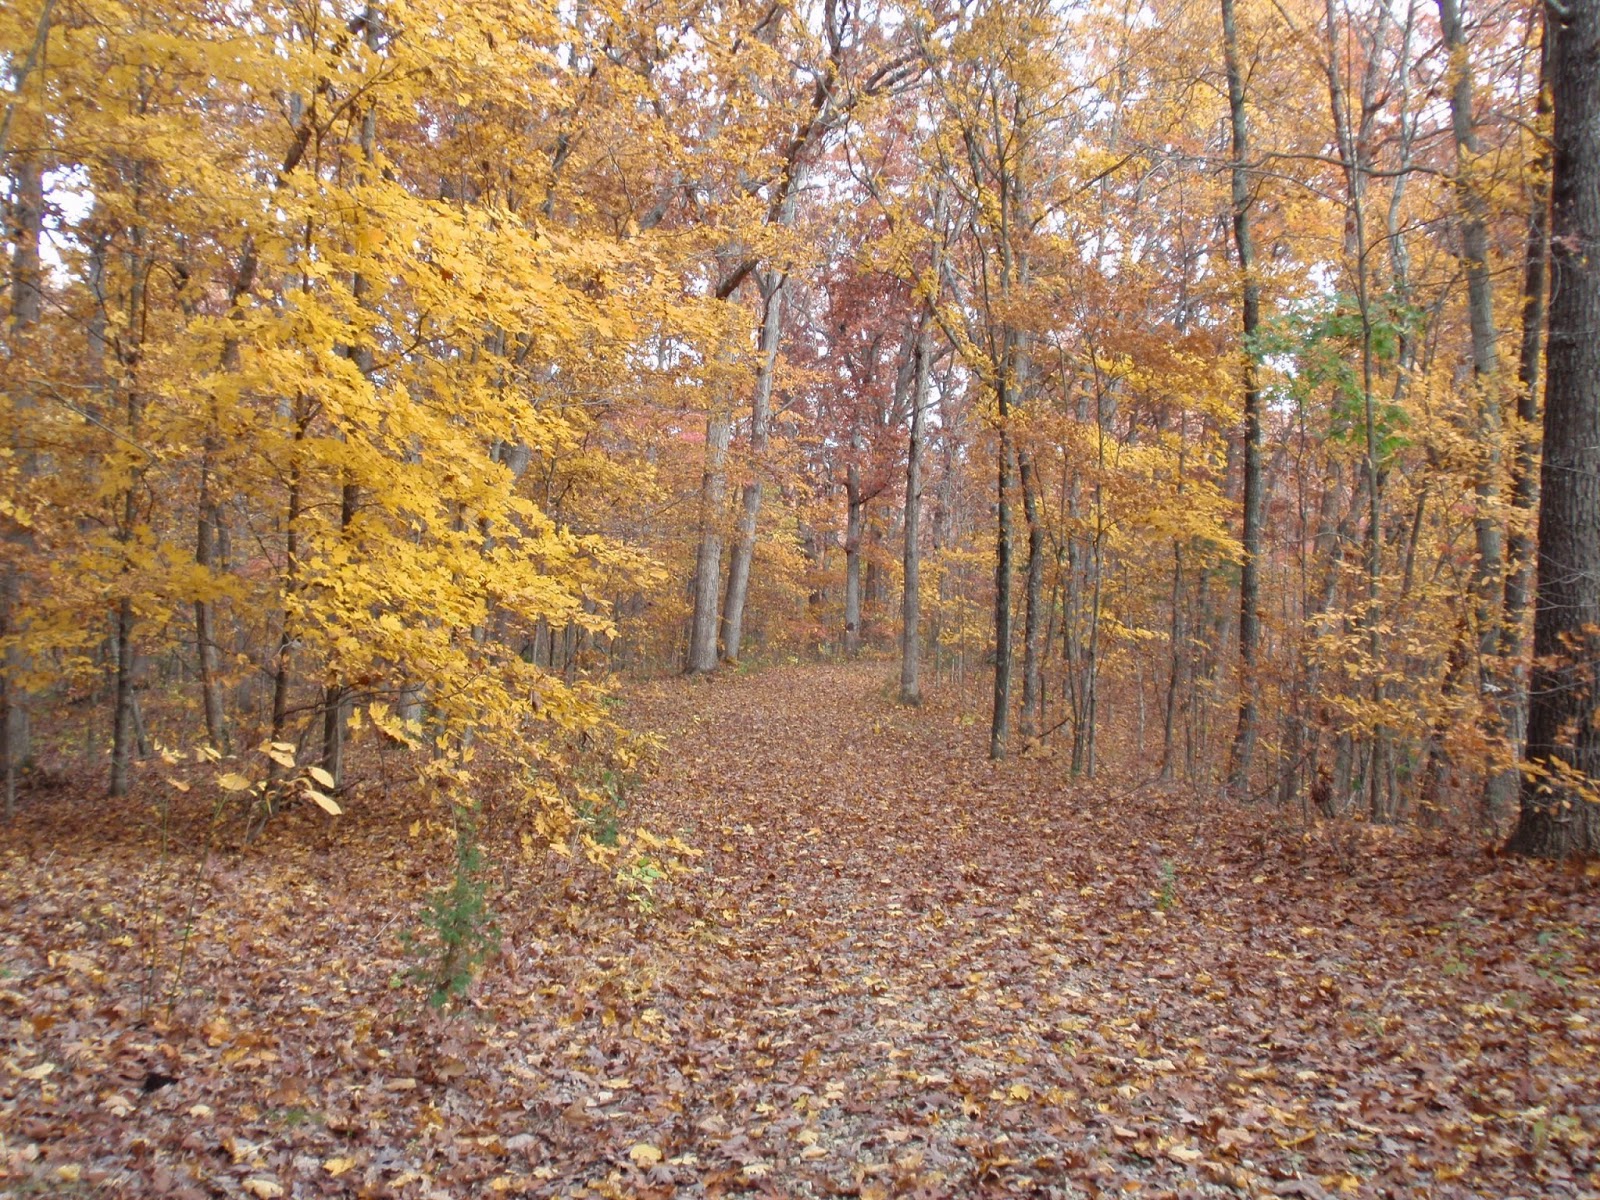
November 2013: the driveway, I had to stop and take a picture.
December 2013: Glenn got a small wind turbine that he decided to attach to our mobile solar trailer. He made welded a very fancy hinged mount so that he could easily mount it.
This was a cold cold day, but he is a trooper.


And here it is high above the trailer.

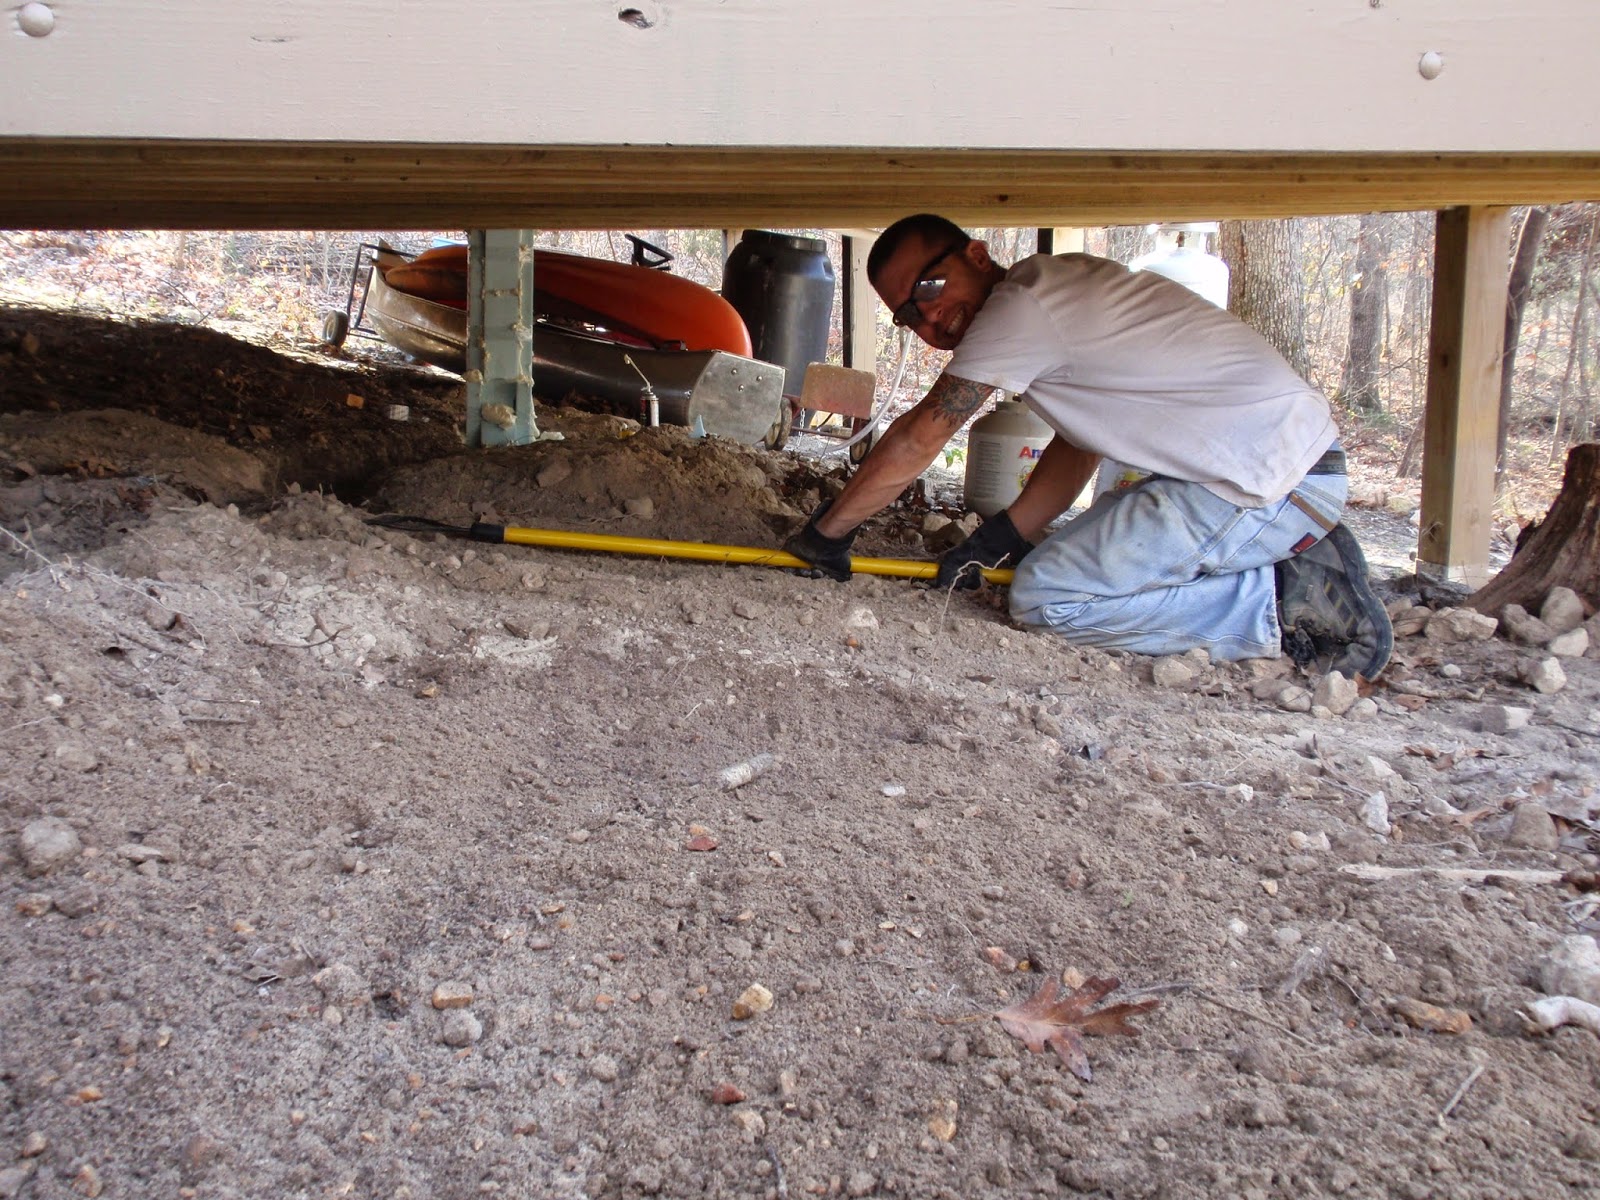
December 2013: A surprisingly warm day and we decided to do some digging so that we could bury our water line that comes from the cistern into the cabin.

The amount of roots through every inch of soil we dug, was unbelievable!

We also covered the blue pex tube with this black foam sleeve.
We will see how it holds up to our Missouri winters.

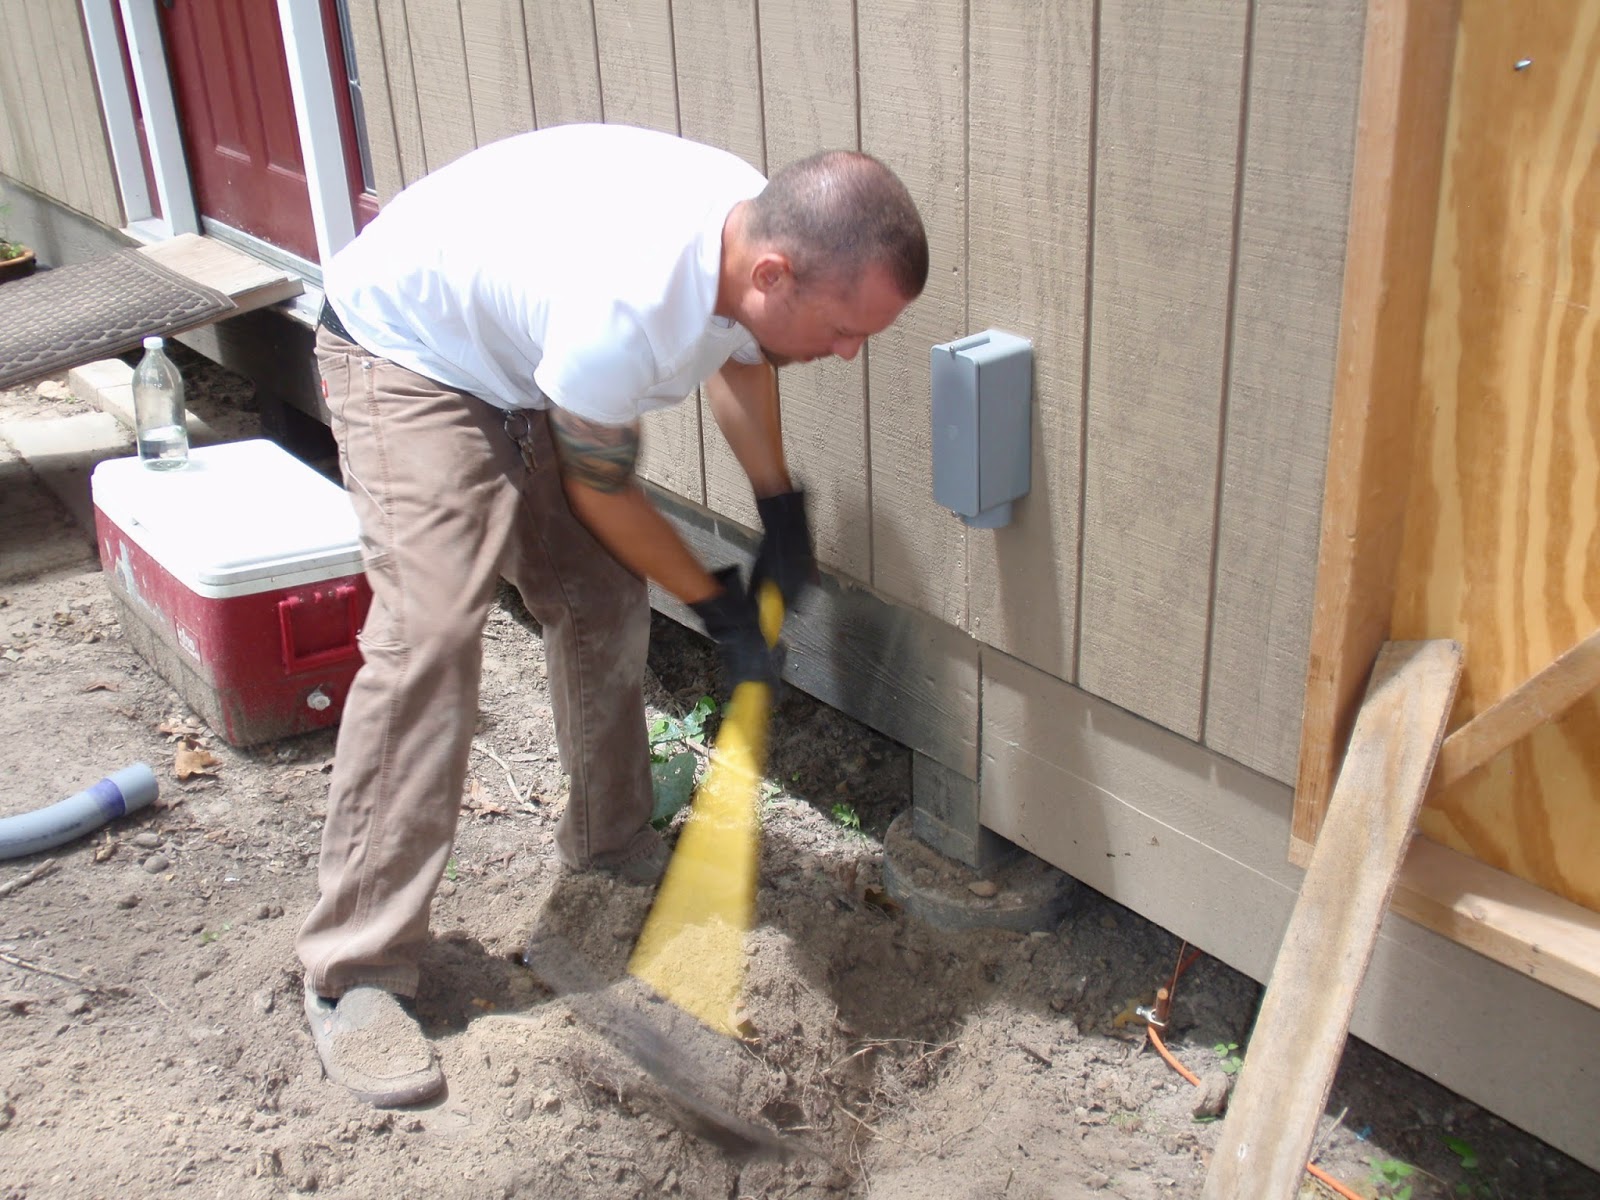
Glenn is raking the dirt back over the water line.
Notice in the background you see a block of foam going from the ground to the base of the cabin... this is the waterline in cased in foam and great stuff, in hopes of no frozen pipes.
This is the waterline coming up through the floor into the extension and Glenn is slightly heating it to get it to go strait and attach to the beginning of the W.O.M. filtration station.
The blue pressure tank is on the left and he added a gutter underneath
the W.O.M. to make it easy to drain or change/clean filters.

May 2014: Moving to the land for good!!!!
Up until this point, we were going back and forth from our city house to the land, working and getting dirty and grimy out in the woods, smelling like wood smoke from our wood burning cook stove, but then, packing it all up and coming "home" to the city where we could push a button on the thermostat if we were too hot or cold. And my favorite, put dishes in the dishwasher, get things out of the fridge and freezer, and turn on the oven or stove top with the exact temperature that the recipe calls for, oh and toss things in the washing machine, then in the dryer... ho-hum, eat up all the energy one could ever want.
Well, good bye you modern conveniences, and good riddance to the mortgage, the electric, water, sewage, and trash bill!!!!!!!!!!!! Welcome FREEDOM!


So, not the best pics of our very loved and appreciated city home, but we were kind of frantically moving and cleaning at this point. :)
May 2014: Well drilling!!!!
Why is it that the most exciting of days on this journey have always involved water? I don't know... but this was a very exciting day! They are drilling the well right beside where the water was being pumped up from our solar river pump.

This was very cool to watch, I have never seen a well being drilled before, I can't believe I didn't get more pictures, I must have been too mesmerized to think about the camera...
or maybe the noise was too distracting.

The simple pump is working like a charm! Glenn and I put the pump in ourselves, the directions were great and the process was pretty simple.


So May 2014 is a busy month! Glenn is preparing the parts for installing the Solar Tracker!!!!
This is the two piece mounting pole. One piece will be sunk into the ground the other piece will attach to it and mount the breaker box for the solar panels.


Glenn and Josh mixing concrete after they dug the hole and set the pole for the array.


The decision was made pretty quickly that we would need a concrete truck
in order to pour the pad for the solar array.

The grey plastic conduit tube is where the wire for the solar panels will be pulled through
then they will run underground from here to the extension of the cabin
where the battery bank and inverter is located.


We had some extra concrete that was already paid for so we quickly through
together sides to make a pad for our new well pump setup.

Concrete pad is finished like a pro thanks to Glenn's friend Gary.

Bolting on the second part of the pole.

Glenn testing the strength, yep its sturdy!

Could NOT have done this without the help of our awesome neighbors Jim and Dianne!

It was still not quite tall enough to reach, so Jim added more dirt to his hill for a little boost up.

Success!!!!

Glenn and Josh are figuring it out, I was sweating just watching them.


Jim looks like he has no worries.


Now Glenn is on his own, and I am NO help to him, I had poison ivy all over my hands
and couldn't even make him a sandwich, so I just took pictures instead.


He carried every single solar panel from the extension of the cabin.....

Up the hill...

Around the truck...

Under the ladder...
the ladder is being used as 1/2 of the scaffolding, you can see the board going through it.

Then he takes time to walk me through the small amount of work that I will need to be doing.

And Wam-Bam! He is done! Such determination!!!!

Ohhhhhh.... Aaaaaaahhh!
We have been told the pictures don't do it justice.

Then he put up his breaker box, and soon he wires them up.
There are two breaker boxes because there are
two different kinds of solar panels in the array (know as a solar salad)
Six solar panels are called Trina's the other six are SolarWorld

June 2014: Digging the trench for the wiring to run from
the solar tracker to the extension of the cabin.

Glenn prepping the conduit before we thread the wire through
and connect it to the the one already set.


We (mostly Glenn) dug forever... ok maybe just a week and 1/2 is all, but still... forever...
Oh, the trusty cooler can be seen in this photo too, he is now enjoying his retirement.


This is standing at about the 1/2 way mark.

The last few swings!! We are almost there!
Now, just cover the conduit and see if we can make some power!

Mojo was pretty exhausted too, even though digging in the dirt is one of his favorite things.

July 2014: We almost have power!
This is the MagnaSine inverter (the big white box) with two MidNite Solar charge controllers on the right. Again, there are two of these because of out two different kinds of solar panels. On the floor to the left is the battery bank. You can see the lowest conduit tube that runs horizontal and then goes into the little grey box. This is where the wires come into the extension after coming out of the two breaker boxes at the solar tracker and into the long trench. Then there are some breakers that they go through before going up to the charge controller, then into the inverter, and to the batteries and then back out the top of the inverter where it goes into the cabin! Fun stuff huh! This is just how I understand it, so it could be a bit off, and I retain no knowledge of all the interesting details that Glenn shares with me, not because I don't want to know... it's just a bit much.

The MidNite Solar charge controller is super cute,
its made to look like an old time, retro like jute box! Cute!

July 2014: Time spent on the Solar Tracker
Once the solar tracker was hooked up to the battery bank, it was time to get it to follow the sun.
Sounds like a simple task... and it was in the end thanks to all the help of a few staff members at Array Technologies, but it did give us a bit of trouble at first. Glenn was on the phone doing some trouble shooting and programming to get her all straitened out.
Mojo secured the perimeter.


The two next photos give a good example of why we decided to go with a solar tracker instead of a stationary set up. In this first picture you see all the trees in the background, this is facing south east. the next picture, I'm facing west. Notice there are trees in both of these directions as well as north and south. We have a little cut out in the woods and we didn't want to just go cutting the the forest so we could get more solar gain. This gets the maximum amount of solar (direct alignment) from about noon to 3 or 4... currently, we will see what this winter brings. The leaves will be off the trees and the sun will be lower...soooo, we shall see!


August 2014: Hello refrigeration!!! Goodbye bags of ice and soggy cheese!!!
The first thing we buy once we have our solar tracker up and running,
is none other than a glorious refrigerator!!!!!!!!

Glenn is running the pex water tubes for our kitchen sink ! ! ! Oh, I'm lucky!

This is also a good picture of our close cell blow-in, insulation.

After we bought this large and in charge refrigerator I did wonder if we should have gone a bit smaller, considering the small space we are working with.
Now I am convinced this was a great choice, I love it! I have already packed if FULL! In order to help save energy consumption from your refrigerator, it is recommended to always keep it as stuffed full as possible, even if it is jugs of water and unopened jars of jelly.

Yeahhhh!! We got our cabinets in too! Glenn is holding up his lil' gang sign E.V. because he has turned his attention to Electric Vehicles lately and has started building one.

We do have all our cabinets in, and our counter tops are set to be installed in about a week, along with our kitchen sink!!! Updates will be posted as soon as I get a chance!
This is Mojo's room, under the stairs and out of the way. :)

I LOVE your blog and I love the two of you! Glenn, how do you know how to build all of that?! It amazes me how smart you are!!!
ReplyDelete♡K
Thank you! I am amazed too, he really is soo smart and talented (I am a lucky ducky). We love you and yours and are glad you enjoyed our blog.
Delete